
Water damage is one of the most stressful and costly problems a homeowner or business owner can face. Whether caused by burst pipes, flooding, appliance leaks, or heavy rain, water can quickly penetrate floors, walls, and hidden spaces — and if left untreated, can lead to structural damage, mold growth, and health hazards. This is why understanding the water damage restoration process is crucial. In this guide, we break down the restoration process step by step so you know what to expect when professionals restore your property.
Water damage restoration is a professional service that involves removing water, drying out affected materials, cleaning and sanitizing the space, and repairing or rebuilding to return your property to its original condition. It’s a systematic process designed to prevent further damage and ensure a safe, healthy living or working environment.
Simply mopping up visible water isn’t enough. Hidden moisture can remain trapped beneath floors, behind walls, and within structural cavities, leading to mold, rot, and compromised building integrity. A professional restoration team follows a structured sequence to minimize damage and deliver lasting results. Let’s explore each of these steps in detail.
The restoration journey begins with a thorough inspection. Before any cleanup or repair, technicians evaluate the extent of the water damage.
What Happens in This Step:
This assessment helps decide which tools and techniques will be used throughout the rest of the process. It also ensures that no hidden areas of moisture are overlooked.
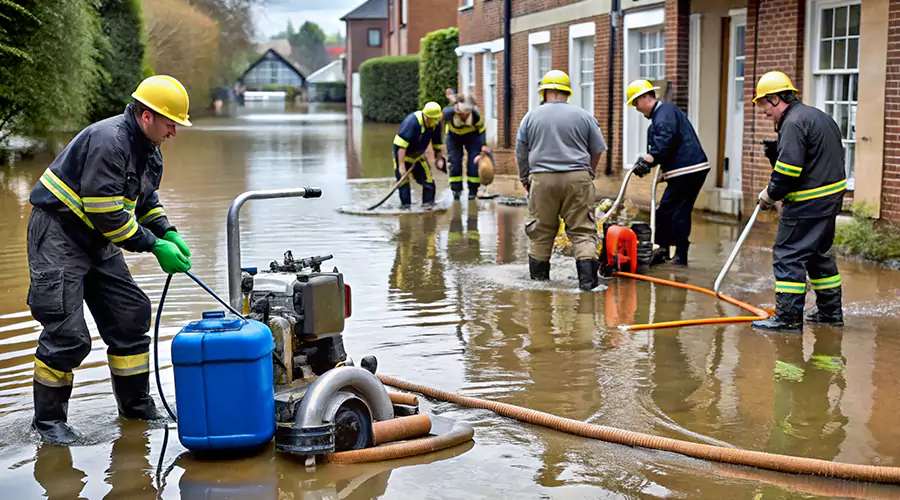
Once the damage is assessed, the most urgent task is removing standing water.
How Professionals Do It:
Removing water quickly is essential because standing water accelerates damage and creates an ideal environment for mold.
Hiring experts for Water Mitigation Services ensures this step often makes the biggest difference in how quickly and effectively your property can be restored.
Even after extraction, moisture can remain in building materials, furniture, and hidden cavities. Professionals use specialized equipment to ensure all moisture is removed.
Tools Used:
This step is crucial to prevent mold and structural issues. Drying can take several days depending on the severity of the damage and the materials affected.
Water damage — especially from contaminated sources like sewage or storm flooding — can leave behind bacteria, mold spores, and unpleasant odors. This phase ensures the space becomes safe and healthy again.
Key Cleaning Tasks:
This step is especially important in cases involving gray or black water because of potential health risks.
The risk of mold increases when moisture isn’t fully eliminated. Some restoration plans include a mold inspection before or after drying.
Mold Remediation Includes:
Mold removal may be required even if hidden behind walls or under flooring, so this step is essential in ensuring the long‑term safety of your space.
Once everything is dry, clean, and safe, it’s time to rebuild and restore.
What This May Include:
The goal is to return your property to its pre‑loss condition, both functionally and aesthetically. For major damage, reconstruction may be extensive.
Before the project is closed, professionals conduct a final walkthrough to ensure:
Technicians will often offer guidance on how to prevent similar damage in the future, such as repairing leaky roofs or improving drainage around your property.
The water damage restoration process is not just cleanup — it’s a comprehensive, structured approach designed to protect your property, health, and peace of mind. From initial assessment to final repair, each step plays a vital role in returning your home or business to a safe, stable, and dry condition. Whether you’re dealing with a minor leak or serious flooding, understanding this step‑by‑step process helps you know what to expect and why professional support matters.
Our certified experts are ready 24/7 to assist you with emergency restoration services.
GET A QUOTE